Table of Contents
- What You’ll Need Before You Start
- Step 1: Wash Your Hands First
- Step 2: Choose the Best Saline Solution for Piercings
- Step 3: Clean Your New Piercing Without Moving the Jewelry
- Step 4: Pat Dry and Keep the Area Dry
- Step 5: Know What to Avoid with New Piercings
- How Long Does a Piercing Take to Heal?
- Signs of Piercing Infection vs. Normal Healing
- Frequently Asked Questions
Last Updated: September 23, 2026
What You’ll Need Before You Start
Knowing how to clean new piercing jewelry starts with having the right supplies on hand before you touch anything, and the same goes for a clean new piercing. At Sandiegopiercingshops, we’ve guided clients through aftercare since 2002, and the single biggest mistake we see is people improvising with whatever’s in the bathroom cabinet.
Gather these items first:
- Sterile saline wound wash (0.9% sodium chloride, no additives)
- Clean paper towels or non-woven gauze
- Antibacterial soap for your hands only
- A clean pillowcase if you’re sleeping on the piercing side
Never use hydrogen peroxide, isopropyl alcohol, or antibacterial ointments on a new piercing. These dry out the tissue, kill healthy cells, and slow the healing process. Many people think stinging means it’s working. It doesn’t.
Step 1: Wash Your Hands First
Hand hygiene is the most important step, and it’s the one most people rush. Wash your hands for a full 20 seconds with warm water and antibacterial soap. Scrub between your fingers, under your nails, and around your wrists.
Step 2: Choose the Best Saline Solution for Piercings
The best saline solution for piercings is a sterile, pre-mixed 0.9% sodium chloride wound wash with no preservatives. That’s it. Nothing else belongs on a healing piercing.
You have two good options:
- Pre-mixed sterile saline spray from a pharmacy or your piercer
- Sterile saline wound wash sold for first aid
Avoid these common mistakes:
- Don’t mix your own salt water. It’s hard to get the ratio right, and tap water isn’t sterile.
- Don’t use contact lens solution or nasal rinse. These contain preservatives.
- Don’t use sea salt soaks in a bowl unless your piercer specifically tells you to.
Step 3: Clean Your New Piercing Without Moving the Jewelry
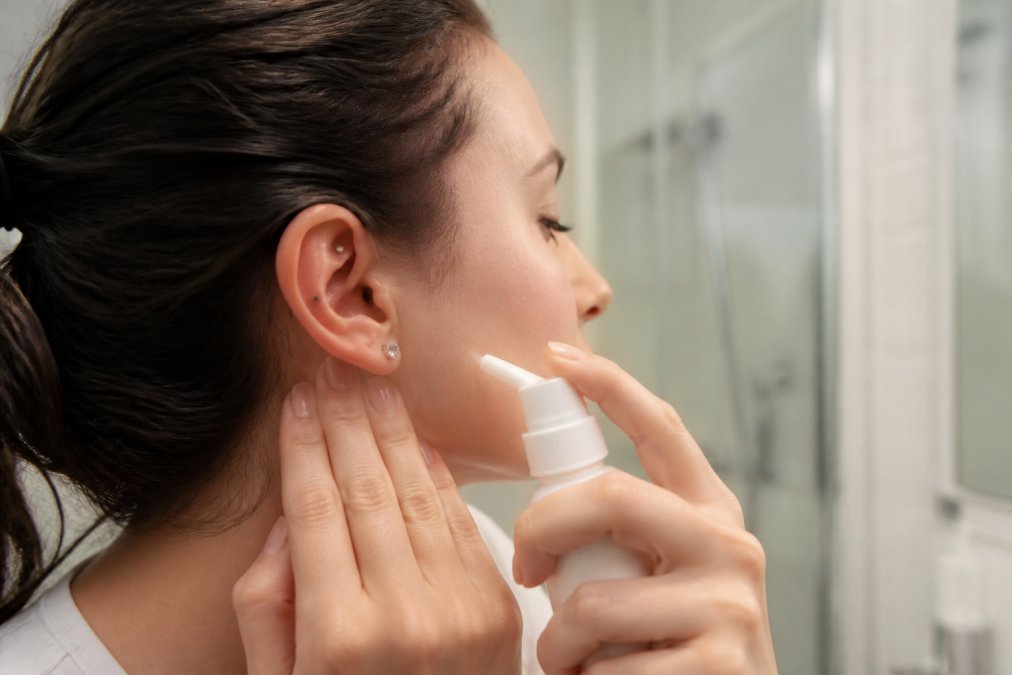
Here’s the process:
- Spray sterile saline directly onto the front and back of the piercing.
- Let it sit for 10 to 15 seconds to soften any crusties.
- Use a clean paper towel to gently wipe away softened crust.
- If crust is stuck, spray again. Never pick at it.
Sleep on a clean pillowcase and try not to roll onto the piercing side. Pressure and friction cause more irritation than almost anything else in the first few weeks.
Step 4: Pat Dry and Keep the Area Dry
After cleaning, pat the area dry with a clean paper towel. Don’t rub. Don’t use a shared towel.
A few practical tips:
- Pat gently around the jewelry, not directly on it.
- Let the area air dry for a minute if you can.
- After showering, pat the piercing dry the same way.
- Avoid swimming pools, hot tubs, and lakes until healing is complete.
Step 5: Know What to Avoid with New Piercings
Knowing what to avoid with new piercings is just as important as knowing what to do. A few habits can set healing back by weeks.
Keep these away from a healing piercing:
- Hydrogen peroxide and isopropyl alcohol, too harsh for new tissue
- Antibacterial ointments, trap bacteria and block airflow
- Makeup, lotions, and sunscreen, clog the piercing
- Tight hats, helmets, and headphones, cause friction and pressure
- Touching or playing with jewelry, the number one cause of piercing bumps
How Long Does a Piercing Take to Heal?
Healing time depends on blood flow, tissue type, and how much the piercing gets disturbed. That is why two people with the same piercing can heal on completely different schedules.
Here is a rough guide:
| Piercing Type | Typical Healing Time |
|---|---|
| Earlobe | 6-8 weeks |
| Cartilage (helix, daith) | 6-12 months |
| Nostril | 4-6 months |
| Navel | 6-12 months |
| Septum | 6-8 weeks |
Why the timelines vary so much
Cartilage has almost no direct blood supply compared to the earlobe, so it heals slowly, sometimes a year or more. Navel piercings sit in an area that bends, folds, and rubs against waistbands, which constantly re-irritates the tissue. Septum piercings heal relatively fast because the tissue is thin and well supplied with blood, but they are easy to disturb every time you blow your nose.
Lifestyle adjustments that change healing speed
Most guides skip this, but the choices you make outside the bathroom affect how fast a piercing closes up.
Sleeping
- Sleeping on the piercing side presses the jewelry into the tissue for hours. Use a travel pillow with your ear in the hole, or sleep on the opposite side.
- Change your pillowcase every few days. A clean pillowcase reduces bacteria and friction.
Clothing and friction
- High-waisted pants, tight waistbands, and belts rub navel piercings. Switch to low-rise or loose waistbands during healing.
- Tight hats, helmets, and over-ear headphones press on cartilage and ear piercings. Loosen or avoid them when you can.
- Long hair catches on jewelry. Tie it back, especially at night.
Water exposure
- Avoid pools, hot tubs, lakes, and oceans until healing is complete. These carry bacteria that a healing piercing cannot defend against.
- Showers are fine. Pat the piercing dry afterward with a clean paper towel.
- If you must swim, ask a professional piercer about waterproof barriers, but understand they are not a guarantee.
Products
- Hairspray, perfume, lotion, and sunscreen can clog the piercing and irritate the tissue. Apply them before cleaning, or cover the piercing.
- Makeup around a facial piercing should be kept well away from the site.
What to do when healing stalls
If a piercing that was improving suddenly gets red, swollen, or bumpy, look for a recent change: a new pillowcase, a new hat, a new hair product, a snag, or a jewelry swap. Removing the trigger usually resolves it within a week or two.
Downsizing matters
Once initial swelling goes down, usually two to eight weeks in, a piercer may swap in a shorter bar. This prevents the jewelry from snagging, keeps the angle correct, and reduces the leverage that causes irritation bumps. Skipping the downsizing appointment is one of the most common reasons a piercing that should have healed cleanly keeps flaring up.
Track your piercing with a photo once a week. Looking back at a month of images makes it obvious whether the trend is improving, plateauing, or getting worse, which is far more useful than judging it day by day.
Signs of Piercing Infection vs. Normal Healing
The visual checklist: what each stage looks like
Healthy healing
- Skin around the piercing is the same color as the rest of your ear, nose, or navel, or only slightly pink right at the edge of the jewelry
- Crust is clear, pale yellow, or whitish and forms in a thin ring at the base of the jewelry
- Swelling is mild and shrinking week over week
- Discharge is limited to lymph fluid, thin, watery, and odorless
- Tenderness fades gradually; it does not spike
Irritated (not infected)
- Redness is confined to a ring around the piercing, not spreading outward
- A small raised bump, a piercing bump or granuloma, sits next to the jewelry
- The bump may weep clear fluid but has no pus
- The area is tender to the touch but not hot
- Symptoms flare after a specific trigger: sleeping on it, snagging it, changing jewelry, or using a harsh product
Infected
- Redness spreads beyond the piercing site and keeps expanding over hours to days
- The skin feels hot compared to the surrounding area
- Discharge turns thick, yellow, green, or gray, and may smell
- Pain becomes throbbing or pulsing rather than sore
- Swelling increases instead of decreasing
- Fever, chills, or feeling generally unwell appear
The mechanism behind each one
Irritation is a mechanical problem. Movement, pressure, moisture, or a metal reaction damages the fragile new tissue inside the piercing channel, and the body responds with inflammation, redness, swelling, and a bump. Remove the trigger and the inflammation resolves on its own over days to weeks.
Troubleshooting the most common irritants
- Crusting that keeps returning: Normal during healing. Soften with sterile saline spray, wipe gently, and leave it alone. Picking it off restarts the cycle.
- A bump next to the jewelry: Almost always irritation, not infection. The most common causes are sleeping on the piercing, snagging it on clothing or hair, or a jewelry metal your body is reacting to. Switch to implant-grade titanium, stop touching it, and give it two to four weeks.
- Jewelry that keeps snagging: The bar may be too long after initial swelling went down. A shorter bar from a professional piercer reduces movement and friction.
- Redness that comes and goes: Often tied to a trigger you can identify, a hat, a helmet, a phone pressed to your ear, or a new hair product. Track what changed before the flare.
- Discharge that changes color or smell: This is the point to stop troubleshooting at home and get it looked at.
When to see a professional
See a doctor or dermatologist if you notice spreading redness, skin that is hot to the touch, thick yellow or green pus, a foul smell, fever, chills, or pain that worsens instead of improving. Do not try to treat a suspected infection at home with ointments, peroxide, or alcohol, these can mask symptoms and delay real treatment.
Irritation is a mechanical problem, fix the trigger and it calms down. Infection is a bacterial problem, it escalates and spreads. If symptoms are getting worse instead of plateauing, treat it as an infection until a professional says otherwise.
Frequently Asked Questions
What is the best cleaning solution for a new piercing?
Sterile saline solution is the only cleaner you need. Look for a wound wash that contains 0.9% sodium chloride and no preservatives or additives. Avoid homemade salt water because it is not sterile and the ratio is hard to get right. Do not use hydrogen peroxide, isopropyl alcohol, or antibacterial soap. These are too harsh and can damage healing tissue.
How often should I clean my new piercing?
Clean your piercing two times per day, once in the morning and once before bed. More frequent cleaning can irritate the area. If you sweat heavily, gently rinse with saline and pat dry. Do not rotate or twist the jewelry during cleaning. Consistent, gentle care is better than aggressive scrubbing.
What are the signs of a piercing infection?
Signs of piercing infection include increased redness, swelling, warmth, throbbing pain, and yellow or green pus with a foul odor. Normal healing may have some clear lymph fluid and mild tenderness. If you notice spreading redness or fever, see a doctor. A professional piercer can also check for irritation versus infection.
How long does a piercing take to heal?
Healing time varies by location. Earlobe piercings take 6 to 8 weeks. Cartilage piercings take 6 to 12 months. Navel and other body piercings can take 6 to 12 months or longer. During this time, keep cleaning with saline and avoid trauma. Even if it looks healed, the inside tissue may still be repairing.
Healing a new piercing takes patience, and the wrong advice online can set you back weeks. At Sandiegopiercingshops, we walk every client through aftercare in person, stock implant-grade jewelry, and offer follow-up checks so you’re never guessing. Our team has been piercing in Pacific Beach since 2002, and we take the time to plan placement around your anatomy, not a template. Call or text (858) 222-0071 to book a consultation and get jewelry that supports your healing from day one.