Table of Contents
- Why Safe Body Piercing for Beginners Starts With the Right Studio
- Needle vs Gun Piercing: Which Is Safer for a First Piercing?
- Choosing Biocompatible Piercing Jewelry for Sensitive Skin
- Healing Time for Ear Piercings and Other Beginner Spots
- Piercing Aftercare Instructions That Actually Work
- How to Prepare Your Body and Budget Before You Pierce
- Conclusion
- Frequently Asked Questions
Last Updated: September 25, 2026
Why Safe Body Piercing for Beginners Starts With the Right Studio
Safe body piercing for beginners begins with one decision: where you get it done. A clean, professional studio controls every variable that leads to infection, scarring, and rejection, from sterilization to jewelry quality. At Sandiegopiercingshops, we have performed piercings since 2002, and the difference between a smooth healing process and a painful complication almost always traces back to the studio.
Signs of a Professional and Safe Piercing Studio
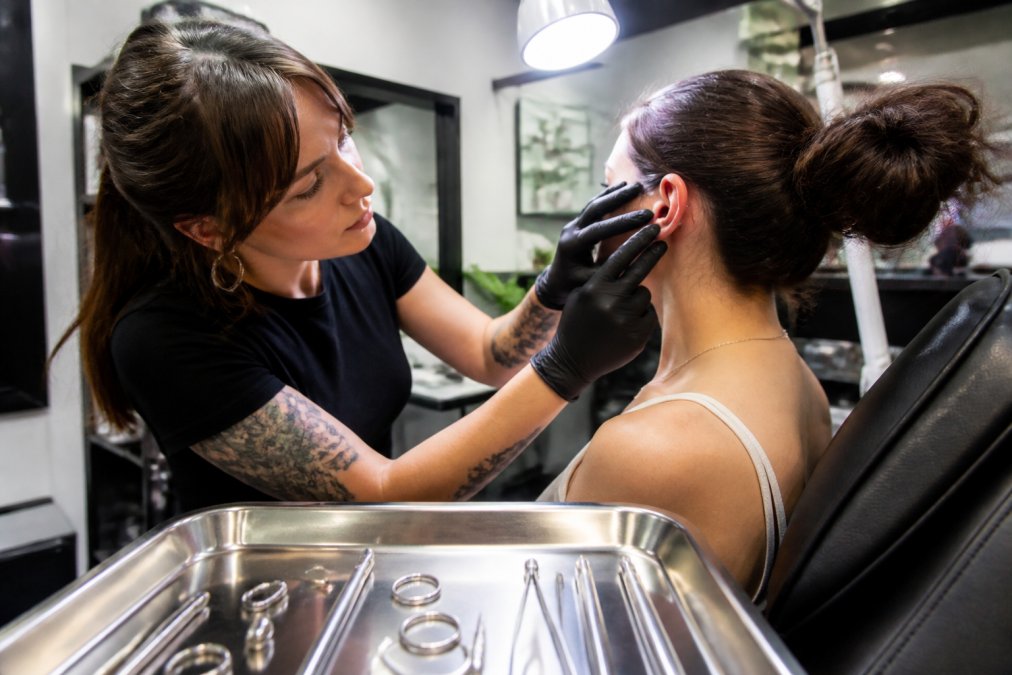
A legitimate studio looks and feels clinical. Watch for these markers:
- Piercers wearing single-use gloves changed between every client
- An autoclave on site for sterilizing reusable tools, with spore test records available
- Pre-sterilized, single-use hollow needles opened in front of you
- A dedicated piercing room separate from the retail floor
- Staff who ask about your anatomy and health history before discussing jewelry
What to Ask Before You Book
Ask direct questions: request the autoclave’s most recent spore test, confirm the needle is single-use and opened in front of you, and ask what metal the initial jewelry is made from. A confident piercer welcomes these questions; a defensive one is a warning sign.
Needle vs Gun Piercing: Which Is Safer for a First Piercing?
A hollow needle is safer than a piercing gun for nearly every piercing, and the gap widens sharply on cartilage. The needle is sharp, hollow, and single-use, creating a clean channel and removing a tiny plug of tissue the jewelry then occupies. A gun forces a blunt stud through tissue under spring-loaded pressure, crushing cells.
| Factor | Hollow Needle | Piercing Gun |
|---|---|---|
| Mechanism | Sharp hollow cut, removes tissue plug | Blunt spring-loaded force, compresses tissue |
| Tissue trauma | Minimal, clean channel | Higher, bruised and crushed cells |
| Sterilization | Single-use, sterile, opened in front of you | Reusable mechanism, hard to fully sterilize |
| Best for cartilage | Yes | No |
| Cross-contamination risk | Very low | Higher |
| Jewelry used | Implant-grade flat-back labret or barbell | Often low-grade stud with butterfly back |
| Typical setting | Dedicated piercing studio | Mall kiosk or retail counter |
Piercing guns are frequently reused and cannot be fully sterilized in an autoclave, which raises cross-contamination risk. The blunt-force mechanism also makes cartilage shattering and permanent scarring more likely. Many studios refuse to pierce cartilage with a gun for exactly these reasons.
Why the Gun Is Still Used, and What That Tells You
Guns persist because they are fast, cheap, and require no formal piercing training. A gun operator is not necessarily a trained piercer, may lack bloodborne-pathogen training, and usually works a retail counter rather than a dedicated piercing room, a shop optimizing for speed and volume over tissue health.
Anatomy-Specific Suitability: Not Every Piercing Works on Every Body
A hollow needle is the right tool, but the right tool on the wrong anatomy still produces a bad outcome.
- Earlobe. Almost universally suitable. Fleshy, well-vascularized, forgiving. A needle is still preferred over a gun for sterility and jewelry quality.
- Helix and other cartilage. Suitable for most ears, but a piercer should check the fold depth and cartilage thickness. A very thin or very curved helix rim may not support a stable piercing and can migrate.
- Nostril. Requires enough nostril wall thickness and a shape that lets a flat-back labret sit flush. Very thin nostrils risk the jewelry cutting through over time.
- Navel. Needs a defined upper lip of the navel and enough tissue depth. An “outie” or a shallow navel often cannot support a traditional navel piercing, and a piercer who proceeds anyway is setting you up for rejection.
- Eyebrow and surface piercings. High rejection risk on almost everyone because the tissue is thin and constantly moving. Many experienced piercers steer beginners away from these entirely.
A Beginner Decision Framework
If you are choosing your first piercing, run this short checklist:
- Is the placement cartilage or flesh? Flesh (lobe) heals faster and tolerates more. Cartilage demands more patience and better aftercare.
- Does the piercer examine your anatomy before agreeing? If not, walk.
- Is the needle single-use and opened in front of you? If the tool is already out of the package, ask why.
- Is the initial jewelry implant-grade and correctly sized? A gun stud with a butterfly back is a red flag on any fresh piercing.
- Does the studio have an autoclave with spore test records? Ask to see them. A confident piercer will show you.
If a shop offers a gun because it is “faster” or “less painful,” that is a sales pitch, not a clinical argument. A skilled piercer using a hollow needle can complete most lobe piercings in seconds with minimal discomfort.
What to Expect During the Procedure
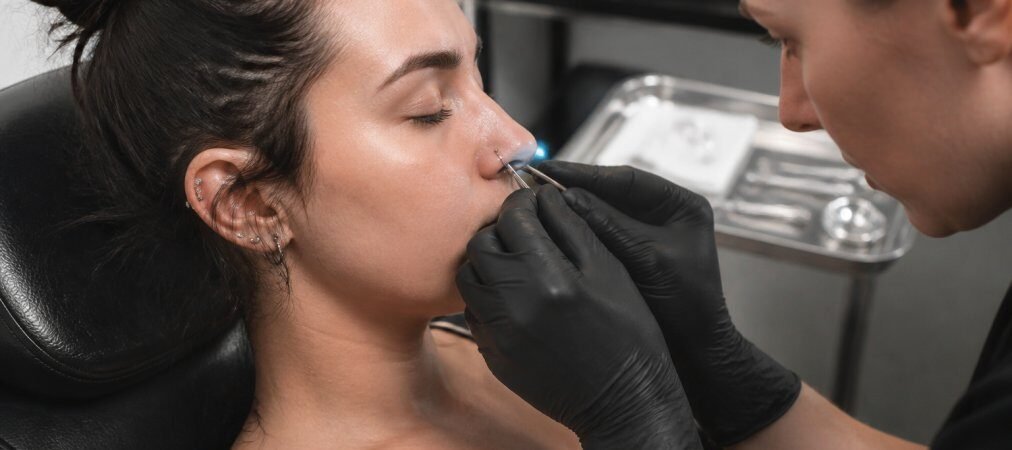
Knowing the sequence removes most of the anxiety. A typical professional piercing runs like this: the piercer cleans the site, marks the placement with a surgical pen, shows you the mark in a mirror, opens the sterile needle in front of you, and completes the piercing in one or two breaths. The needle is withdrawn and the jewelry threaded through the hollow channel, usually under a minute.
Choosing Biocompatible Piercing Jewelry for Sensitive Skin
Biocompatible piercing jewelry is metal your body tolerates without reacting, and for a fresh piercing it is not optional. The safest options, implant-grade titanium, niobium, and 14k or 18k solid gold, resist corrosion and release minimal ions into healing tissue.
Why Initial Jewelry Matters More Than You Think
The first piece of jewelry stays in during the entire healing process, which can run for months. Low-quality metal or a poor fit causes irritation, granuloma formation, and sometimes migration. A professional piercer selects initial jewelry sized to your anatomy.
Healing Time for Ear Piercings and Other Beginner Spots
Healing time for ear piercings varies widely by location, and any chart number is a range, not a promise. A lobe piercing typically heals in six to eight weeks, while cartilage piercings like the helix can take six months to a year. Tissue type and blood supply drive the timeline, but so do your anatomy, aftercare discipline, and daily management.
| Piercing | Typical Healing Time | Why It Takes That Long |
|---|---|---|
| Earlobe | 6-8 weeks | Fleshy, well-vascularized, low movement |
| Helix / cartilage | 6-12 months | Minimal blood supply, constant movement from hair and sleep |
| Nostril | 4-6 months | Thin tissue, prone to irritation bumps from touching |
| Navel | 6-12 months | High movement, waistbands, sweat, and friction |
| Eyebrow | 6-8 weeks if it survives | Thin tissue, high rejection rate |
Why the Same Piercing Heals Differently on Two People
Two people can get the same helix piercing on the same day and heal on completely different schedules. The variables that matter most:
- Blood supply at the site. The lobe is rich in capillaries; cartilage is not. More blood means faster tissue repair.
- Anatomy. A thick, well-defined cartilage fold holds jewelry more stably than a thin, curved rim. Unstable placement means micro-movement, and micro-movement means inflammation.
- Immune response and overall health. Sleep, stress, nutrition, and any underlying conditions all affect how quickly the body builds the fistula.
- Aftercare consistency. Gentle, hands-off cleaning heals faster than aggressive or neglectful care. Both extremes set you back.
- Lifestyle friction. This is the variable beginners underestimate most, and it is covered below.
Post-Piercing Lifestyle Adjustments Nobody Warns You About
Most guides stop at “clean it with saline,” but your daily habits determine whether the piercing heals on schedule or drags on for months.
Downsizing matters. Once the initial swelling settles, usually after a few weeks, a piercer swaps in a shorter bar. Leaving a long bar in too long invites snags, migration, and irritation bumps, and it is one of the most common reasons a piercing that was healing well suddenly flares up.
Cartilage Piercing Healing Challenges
Cartilage heals slowly because it has minimal blood supply compared to the lobe, making cartilage piercings more prone to inflammation, granulomas, and migration. Sleeping on the piercing, snagging it on clothing, or swapping jewelry too early can set healing back weeks. Patience is not optional, and neither is a piercer who checks placement and jewelry fit at a follow-up.
When Healing Is Not Progressing
Normal healing brings some redness, mild swelling, and clear lymph fluid that crusts at the jewelry. What is not expected: spreading redness, warmth, throbbing pain, yellow or green pus, or a bump that keeps growing. If those appear, contact a healthcare provider and do not remove the jewelry yourself, because trapping infection under closed skin can worsen it.
Piercing Aftercare Instructions That Actually Work
Piercing aftercare instructions come down to three rules: clean gently, do not touch, and do not rotate the jewelry. Use sterile saline once or twice daily and otherwise leave the piercing alone. Skip alcohol, hydrogen peroxide, and homemade salt water, all of which irritate healing tissue.
Signs of Infection and When to Get Help
Normal healing brings some redness, mild swelling, and clear lymph fluid. Infection looks different: spreading redness, warmth, throbbing pain, and yellow or green pus. If those appear, contact a healthcare provider. Do not remove the jewelry yourself, because trapping infection under closed skin can worsen it.
How to Prepare Your Body and Budget Before You Pierce
Preparation starts before you walk in. Eat a real meal and hydrate, since low blood sugar makes fainting more likely. Skip alcohol for 24 hours. Get a good night’s sleep, and wear loose clothing that will not catch on the fresh piercing.
The cheapest option is rarely the safest one. Paying for sterile technique and implant-grade jewelry up front costs far less than treating an infection or a rejection later.
Conclusion
A first piercing should be exciting, not a source of anxiety or a months-long complication. The variables that matter, sterile technique, a hollow needle, biocompatible jewelry, and disciplined aftercare, are all within your control when you choose the right studio.
Frequently Asked Questions
What is the easiest piercing to get for a beginner?
Earlobe piercings are the most beginner-friendly option. They sit in soft tissue rather than cartilage, so they heal faster (typically 6 to 8 weeks) and cause less discomfort. A standard lobe piercing also has lower risk of migration or rejection than cartilage placements. If you want something beyond the lobe, a helix or nostril piercing is a common next step, but expect a longer healing window of 6 to 12 months and more careful aftercare.
What is the difference between needle and gun piercing?
A hollow needle creates a clean channel by removing a tiny section of tissue, which allows the jewelry to sit properly and heal with less trauma. A piercing gun forces a blunt stud through the tissue, which can crush cartilage and is difficult to sterilize fully between clients. Most professional studios use single-use hollow needles and autoclave-sterilized tools. Piercing guns are more likely to cause tissue trauma, cross-contamination, and longer healing times.
How do I identify high-quality, biocompatible piercing jewelry?
Look for implant-grade titanium, niobium, or 14k to 18k solid gold. These materials are hypoallergenic and safe for long-term wear. Avoid jewelry labeled surgical steel, which can contain nickel and trigger irritation. Ask the piercer what metal the initial jewelry is made from and whether it has a mirror-polish finish. A reputable studio will stock implant-grade options and explain why the material matters for your healing process.
What are the signs of a professional and safe piercing studio?
A safe studio uses an autoclave for sterilization, opens sealed sterile packaging in front of you, and uses single-use hollow needles. The piercer should wear gloves, clean the area with aseptic technique, and walk you through aftercare instructions before you leave. Ask about their autoclave spore testing records and whether they use implant-grade initial jewelry. A studio that rushes you or avoids these questions is not one to trust with a safe body piercing.
How long does it take for common beginner piercings to heal?
Earlobe piercings typically heal in 6 to 8 weeks. Cartilage piercings like helix or conch take 6 to 12 months. Navel piercings need 6 to 12 months, and nostril piercings heal in 4 to 6 months. These timelines assume proper aftercare with saline solution and no touching, twisting, or swapping jewelry early. Healing time for ear piercings varies by placement, your immune response, and how well you follow aftercare instructions.
What are the signs of infection and when should I get help?
Normal healing brings some redness, mild swelling, and clear lymph fluid. Signs of infection include spreading redness, increasing pain, thick yellow or green discharge, and a hot feeling around the piercing. If you notice these, contact your piercer first for guidance. If symptoms worsen or you develop a fever, see a doctor. A granuloma or irritation bump is not always an infection, but a professional piercer can tell the difference and recommend next steps.